Thursday 2 March 2017

Bathroom Love

I often give myself a real hard time - always putting myself down for not being "creative" anymore. Hardly drawing, hardly buying any nice new clothes, not taking any fun risks with my appearance. But then I look back at this and realise this is where it all goes! Of course I am still a creative person! It's just my focus has switched to an entirely new outlet that I've never explored before and I have such passion and pride in it.

You might not believe me but I designed and picked out all of the accessories in this bathroom. From the size and type of tile, to the taps and all the finer details. I spent every night after work, even some lunch breaks and every weekend for nearly a year (along with my one in a million Dad and boyfriend/fiancè) working on this. I have to feel the material I'm working with, whether it's collage or grout, so I literally had no fingertips for about a month after the amount of grout that I had to use. My hands have never looked less feminine after this year and a half working on our home.

The old bathroom was a terrible layout with a worn, dirty and useless suite with tiles cracked and coming loose. We ripped the whole lot out and started again from floor to ceiling and here it is...


Absolutely in love with this mirror from Illuminated Mirrors it connects to your phone through bluetooth to play music, de-mists itself and lights up with all these dreamy colours. It's so nice to run a bath listening to some Ed (Sheeran) with just this on as the light.


The doorstop that looks like my bf!


How cool is this shower head? The temperature lights it up to show cold - blue, hot - red and just right - purple.


Bathroom suite: B&Q
Shower head, shower screen and taps: Victoria Plum
Copper accessories: Habitat
Tiles: Tile Mountain
Towels: Orla Kiely

Wednesday 6 July 2016

Kitchen design ain't so scary...

As if buying your first home as a young couple isn't daunting enough, we casually took on the challenge to gut the entire house and start from scratch. The second room to be completed was the kitchen. Now I love kitchens. I love cooking, baking, socialising, tidying, organising and (hate to say it) cleaning a kitchen. Obviously our dream kitchen is yet to come, but this is a blinding start. I am SO proud of it.

To start off, I bought every magazine, spent nights on pinterest and drew out tons of ideas. With our room measurements to hand, we then went to Wickes, Wren, Homebase and B&Q to have design consultations. My advice? Go to them all to gather ideas and inspiration, they're free and will either give you print outs or emails with 360 degree views of your design. Then take your ideas and design to B&Q. They were the cheapest by over £2000 in some instances and give you access to a design tool which is literally like real life Sims!!! I was in my element! It takes a while to get to grips with it, but once you have it, it is so much fun! I created floor plans of my design, adding in soft close hinges, pull out racks etc. and ended up with a 360 view of our future kitchen.

We took apart the kitchen until it was a box with some vulnerable pipes poking out from the walls. Scraping off the paint, smashing off the tiles, pulling down the old units, ceiling plastered, new floor laid, spotlights, new radiator...everything you can do, we did it. When I say we, I mean my Dad, my bf and myself.

And here we have it, my designs, the kitchen before and the after. Just need the plug sockets changed but I have the patience of a saint.


My designs from B&Q design tool:


All of my large appliances I bought from Tesco with my discount.
The Smeg fridge, toaster and kettle are from John Lewis.
Copper tins - Tesco
Cream trolley - Ikea
Bin - Made.com


Tuesday 16 February 2016

Home Owner: Master Bedroom

So I have been very absent from drawing and my blog for the past few months. This is due to the fact I am now a HOME OWNER!! My boyfriend and I had been saving since Jan 2014 and in May 2015 we had an offer accepted on our little home, 6 months later and the keys were ours!

Although the house ticked all of our boxes we went in feet first and gutted every single room out. I'm talking new kitchen, new bathroom, new carpet, new windows, plastered ceilings, new flooring - the lot.

Slowly but surely it's really coming together and near enough every room is complete. I am proud to blog...our master bedroom.


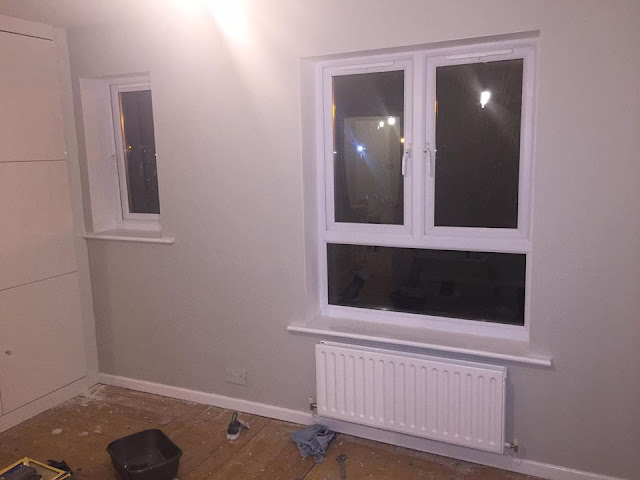
Before: This was always my favourite room of the house (best of a bad bunch mind). I loved the windows and the light, the exposed floorboards and gloss fitted wardrobes. Straight away we knew we wanted all the ceilings plastered from artex to smooth, a new colour scheme and some TLC. Looking at the bed, the wall to the right was painted a lemon colour and there was only one plug socket in the room.


Plastered ceilings and choosing colour

Pebble Shore by Dulux

We white washed the floor with watered down emulsion paint, painted the skirting, radiator, window sills and doors and my dad put in 3 new sockets for us.


Our bedroom taking shape while we waited to put the shelf up and the fitted shutters. The surveyor from Hillary's blinds recommended blinds in a box for temporary blinds, I cannot recommend these enough! The stayed up for a good 10 weeks, shut out all light and were easy to use, but did rip the paint off in the living room :( not the end of the world! 3 blinds for £24 and you could cut them to the shape you needed as per pic below.


Shelf: LACK from IKEA, Lamp from Habitat


Copper bedside table: Made.com
Bedding: The White Company
Throw: IKEA
Grey and wooden bedside table: Tesco
Sheepskin rug: IKEA
Copper bin: notonthehighstreet.com